How to use Fliteskin
TM
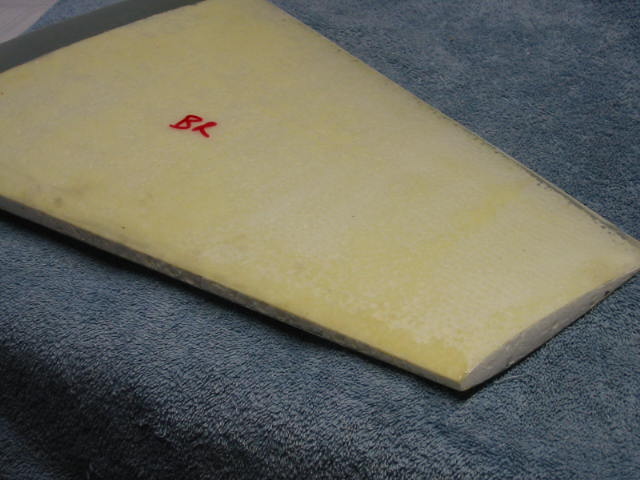
FliteskinTM can be attached to a balsa or ply frame
in 3 different ways:
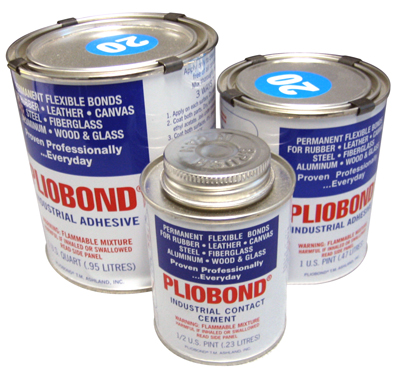
1. For structural applications: Original
GorillaTM Polyurethane
glue

2. Aviation grade contact cement like
Pliobond
3.
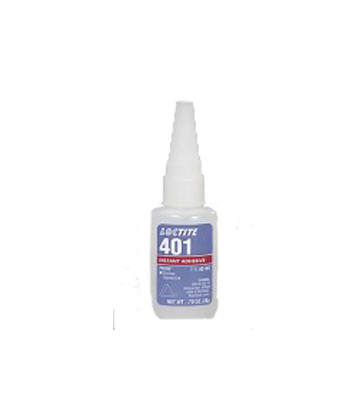
For Non structural applications: slow curing CA (Cyano)
glue suitable for fiberglass and plastics such as Loctite 40104
Prism.
* Always sand
the areas with 80/100 grit or similar.
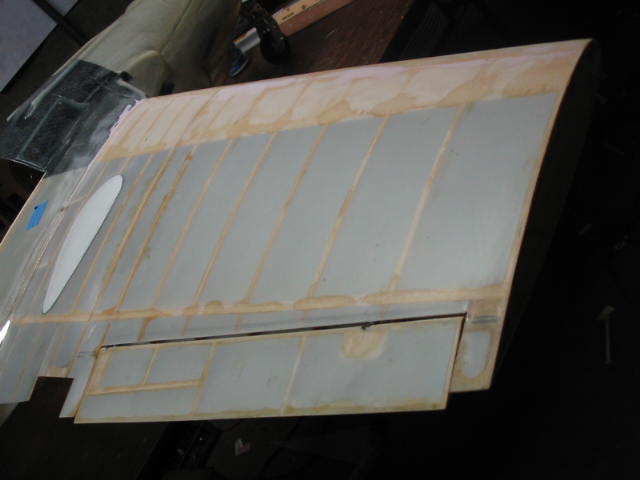
Application on framed wings:
-
Un-roll the
FliteskinTM
sheet in a clean table or building board.
-
Position sheets over the plans to determine
material needed.
-
Sand the entire wing top with a long T sand paper
to make sure all ribs are even.
-
Using sharp knife (box cutter) and straight edge, cut the sheet
so it overlaps 1/4"
to 1/2" (6,5mm to 12,5mm) over the leading edge and wing tips.
-
Position the skin in place over the wing (dry) and pin trough the skin in 2 or 3 places on the
Leading edge, if covering a fuselage, over a
supporting stringer. These will
be the positioning guides.
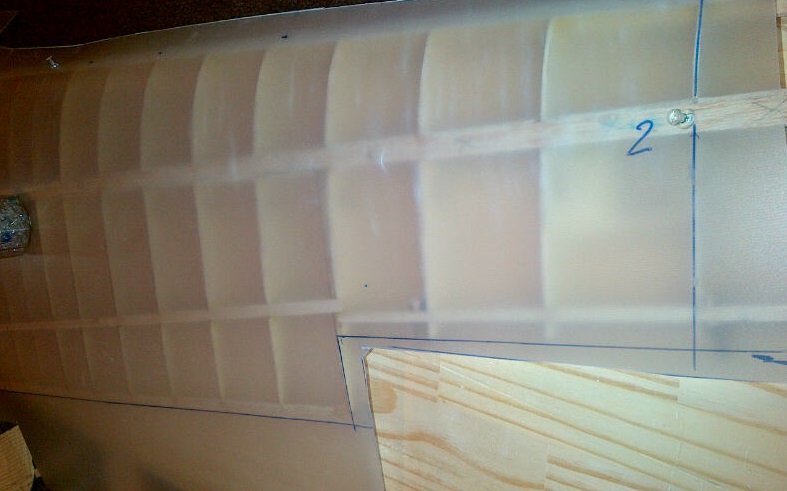

6. While positioned on the surface,
mark where the ribs, stringers and edges are located so you know
where to sand.
7. Next remove skin from frame
and sand with rough sand paper 80/100 over those areas
specially the leading edge.
8. Apply thin bids of Polyurethane Gorilla glue only
to the ribs, spars, etc. You will have about 15 minutes before
glue starts to foam.
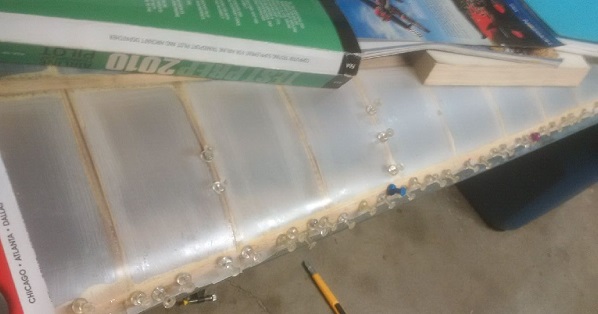
9. After positioning the skin in place using the pin
holes previously made as a guide, place as many pins over the
leading edge as possible
making sure the entire leading edge is
tight against the wood. See pictures below.
10.
Stack
layers of soft magazines or paper reams over the entire wing.
This work very well to ensure the skin conforms to the
frame.
DO NOT
USE WEIGHTS
10. As shown in the pictures below, a few
additional thumb tacks were placed over a few ribs. These
sometimes are needed to help with the
curvature of the wing.
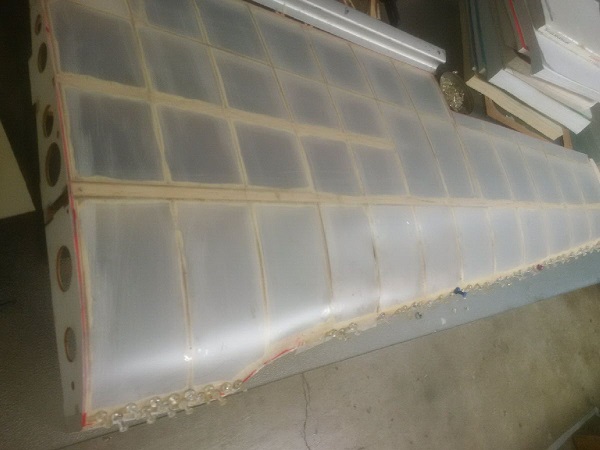
11. After both Top and Bottom are sheeted you will
fiberglass the Leading edge and wing tips using strips
of glass cloth and resin.
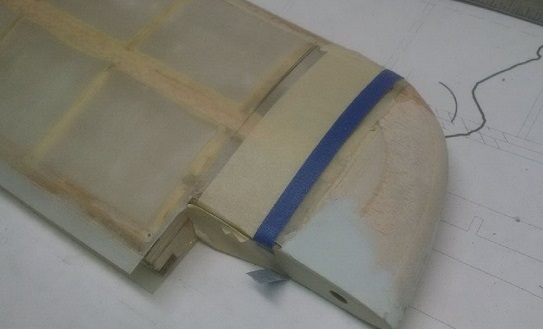
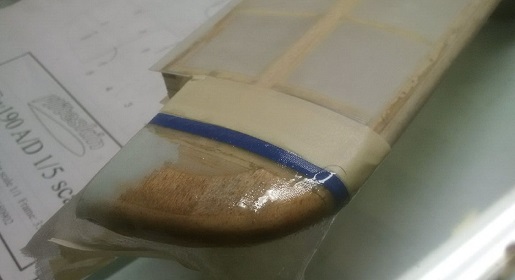
12.
Use masking tape to define the
leading edge along the wing. Spray the L.E. with a light coat of
3M77 and position the fiberglass
cloth in place. Brush two coats
of finishing resin and let it set.
13.
Once resin has set, trim the L.E with sharp knife using the
masking tape as reference.
 .
.
Application on foam wings:
Sheeting foam wings with FliteskinTM is so simple and
the results are so great that after the first use, you'll never go
back to the long and messy process of sheeting with
balsa, fiberglass and resin.
Fliteskin should be glued directly to foam cores using
Original
GorillaTM Polyurethane
glue
which is safe on foam.
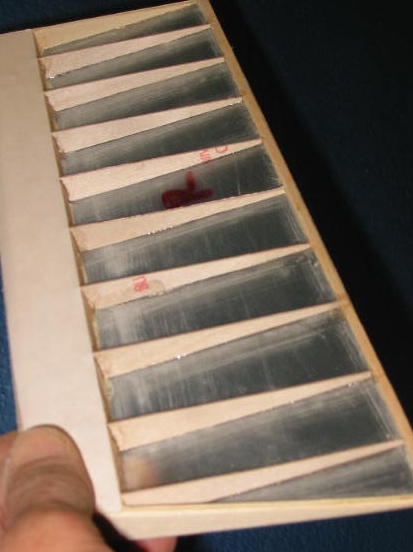
1.
Prepare the foam cores as you would for balsa sheeting (cut
channels, install spars, etc).
2.
Install leading edges and wing tips. Sand even with the surface of
the foam.
3.
Using
a metal ruler and a hobby knife, cut the pieces of Fliteskin
TM to
fit the core (top & bottom) with an extra 1/4" or so to cover
Leading edge and/or tips. It takes about 4 or 5 scores of the
blade to cut through the sheet, alternating both sides of the
blade works best. FliteskinTM
can also be cut with
scissors but the ruler and knife method assures a straight line
cut over the plans. You can choose to add the leading edge and
wing tip after sheeting is completed but the first option
facilitates fiber glassing.
4.
With
a little experience you can glue top and bottom skins at once;
lay both pieces of sheeting flat on the table (trailing edge to
trailing edge) and join with masking tape on the outside surface.
5. The
inner side of the skins must be cleaned and sanded with 80/100
grit to increase the mechanical bonding.
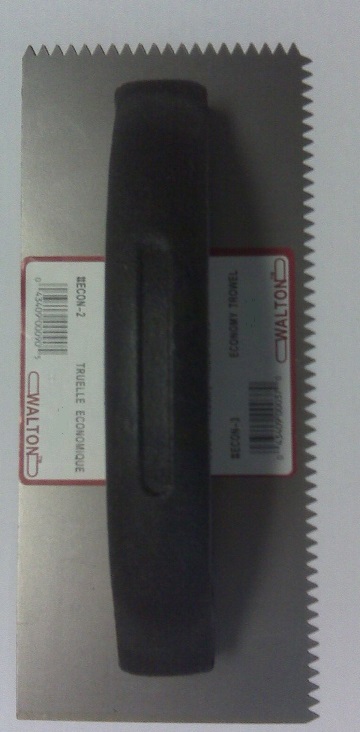
6.
Spread the glue evenly with notched side of trowel
(allows for expansion) over the COMPLETE surface of the skins. Do
not apply glue to the cores. Allow a thicker coat on the edges.
7
.
Place
assembly inside the foam cradle placing a flat board on top with
enough weight to keep from lifting.
8
.
Once
the assembly dries, it will be very rigid and strong. Now you
can cover the leading edges and wing tips with a strip of glass
cloth.
9
.
Ailerons and elevators can be cut and hinged using balsa blocks.
DO NOT apply HOT IRON directly
to Fliteskin
Frequently asked questions:
1. Is Fliteskin epoxy based? Yes, epoxy resin is the main ingredient in the sheets.
2. Is Fliteskin capable of accommodating compound curves? No. It is restricted single curves
	3. Why polyurethane glue? The expansion of the polyurethane glue increases the area of contact and it works well on
	    wood frames.
4. What is the best technique to cover leading edges (L.E.)? Once you have the top and bottom of the wing are covered, the exposed L.E.
should be covered with a strip of fiberglass cloth and epoxy resin as described above.
5. Can it be used to cover foam wings? If you are covering foam wings, spread the glue with a trowel.
A trowel will allow only thin strips of glue and prevent too much expansion.
Copyright © 2023 Fliteskin Aeroscale